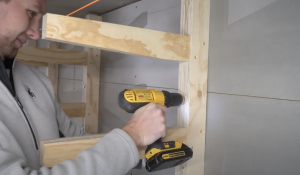
Sanding and smoothing are crucial steps in preparing wood for finishing. The first step is to remove any existing finish or paint from the wood surface. This can be done using sandpaper or a chemical paint stripper. Once the old finish is removed, the wood should be sanded to smooth out any imperfections and create a uniform surface for staining or painting. Start with a coarse grit sandpaper to remove any rough spots or uneven areas, then gradually move to finer grits to achieve a smooth finish. It’s important to sand with the grain of the wood to avoid creating scratches or marks that will be visible after finishing. After sanding, the wood should be wiped down with a tack cloth to remove any dust or debris before moving on to the next step.
Another method for smoothing wood is using a wood planer or jointer to level out any uneven surfaces. This is especially important for larger pieces of wood or for projects that require precise measurements. A planer can be used to remove any high spots or imperfections, while a jointer can be used to create a flat, smooth surface along the edges of the wood. Once the wood has been planed and jointed, it can be sanded to further smooth out the surface and prepare it for finishing. This method is often used for larger woodworking projects such as tables, cabinets, or doors, where a perfectly flat and smooth surface is essential for a professional finish.
Key Takeaways
- Sanding and smoothing are essential steps to prepare the surface for staining and finishing.
- Staining and coloring can enhance the natural beauty of the wood and add depth to the finish.
- Applying a protective finish is crucial to protect the wood from wear and tear, moisture, and other damage.
- Creating a distressed or antique look can add character and charm to the finished piece.
- Adding decorative elements such as hardware or embellishments can personalize and enhance the overall look of the project.
- Buffing and polishing can give the finished piece a smooth and lustrous appearance.
- Final inspection and touch-ups ensure that the project meets the desired quality standards before it is considered complete.
Staining and coloring
Staining and coloring wood is a great way to enhance its natural beauty and add depth and richness to the finish. There are many different types of wood stains available, including oil-based, water-based, gel stains, and more. Each type of stain has its own unique properties and application methods, so it’s important to choose the right one for your project. Before applying the stain, it’s important to test it on a small, inconspicuous area of the wood to ensure that it will achieve the desired color and effect. Once the stain has been chosen, it can be applied using a brush, cloth, or sponge, depending on the type of stain and the desired finish.
In addition to traditional wood stains, there are also a variety of colored finishes available that can be used to add a pop of color to wood projects. These finishes come in a wide range of colors and can be applied in much the same way as traditional stains. They can be used to create a bold statement piece or to complement existing decor in a room. Whether using traditional stains or colored finishes, it’s important to apply the product evenly and consistently to achieve a professional-looking finish. After applying the stain or colored finish, it’s important to allow it to dry completely before moving on to the next step in the finishing process.
Applying a protective finish
Once the wood has been sanded, smoothed, and stained or colored, it’s time to apply a protective finish to seal and protect the wood surface. There are many different types of protective finishes available, including polyurethane, lacquer, shellac, varnish, and more. Each type of finish has its own unique properties and application methods, so it’s important to choose the right one for your project. Before applying the protective finish, it’s important to ensure that the wood surface is clean and free of any dust or debris. This can be done by wiping down the surface with a tack cloth or using compressed air to blow away any remaining particles.
Once the wood surface is clean, the protective finish can be applied using a brush, roller, or sprayer, depending on the type of finish and the desired effect. It’s important to apply the finish evenly and consistently to achieve a professional-looking result. Multiple coats may be necessary to achieve the desired level of protection and sheen, so it’s important to follow the manufacturer’s instructions for drying times and reapplication. After applying the protective finish, it’s important to allow it to dry completely before moving on to the next step in the finishing process.
Creating a distressed or antique look
Creating a distressed or antique look on wood is a popular finishing technique that adds character and charm to furniture and other woodworking projects. There are many different methods for achieving this look, including sanding, staining, painting, and more. One common method for distressing wood is using sandpaper or a wire brush to create small scratches and dents on the surface. This can be done in areas that would naturally show wear over time, such as edges, corners, and high-traffic areas. Another method for distressing wood is using a hammer or chain to create larger dents and divots in the surface. This can be done in a random pattern to mimic natural wear and tear.
In addition to physical distressing techniques, there are also chemical methods for achieving an antique look on wood. One popular method is using a vinegar and steel wool solution to create an aged patina on the surface of the wood. This can be applied with a brush or cloth and left to dry before applying a protective finish. Another method is using a glaze or antiquing wax to add depth and dimension to the finish. These products can be applied with a brush or cloth and then wiped away in certain areas to create an aged appearance. Whether using physical or chemical distressing techniques, it’s important to experiment on a small area of the wood before applying the technique to the entire project.
Adding decorative elements
Adding decorative elements to wood projects is a great way to personalize and enhance their appearance. There are many different ways to add decorative elements to wood, including carving, inlay, marquetry, and more. Carving is a traditional woodworking technique that involves removing material from the surface of the wood to create intricate designs and patterns. This can be done using hand tools such as chisels and gouges, or with power tools such as routers and carving machines. Inlay is another popular decorative technique that involves inserting pieces of contrasting wood, metal, or other materials into the surface of the wood to create patterns or images.
Marquetry is a decorative technique that involves cutting thin pieces of wood into intricate shapes and patterns and then assembling them into a larger design. This can be done using hand tools such as saws and chisels, or with power tools such as scroll saws and laser cutters. In addition to these traditional decorative techniques, there are also many modern methods for adding decorative elements to wood projects. This can include using stencils, decals, or vinyl cutouts to create custom designs and patterns on the surface of the wood. Whether using traditional or modern decorative techniques, it’s important to plan out the design carefully before beginning work and to practice on scrap wood before applying the technique to the final project.
Buffing and polishing

Buffing and polishing are important final steps in achieving a professional-looking finish on wood projects. After applying the protective finish, it’s important to allow it to dry completely before buffing and polishing the surface. This can be done using a variety of tools and materials, including buffing pads, polishing compounds, and rubbing compounds. The first step in buffing and polishing is to use a buffing pad attached to a power tool such as a drill or polisher to remove any imperfections in the finish and create a smooth surface. This can be done using a medium-grit compound to remove any scratches or blemishes in the finish.
After buffing with a medium-grit compound, it’s important to switch to a finer-grit compound to achieve a high-gloss shine on the surface of the wood. This can be done using a soft buffing pad attached to a power tool or by hand using a soft cloth or sponge. It’s important to apply the compound evenly and consistently across the entire surface of the wood to achieve a uniform shine. After buffing with a fine-grit compound, it’s important to wipe down the surface with a clean cloth or tack cloth to remove any remaining compound before inspecting the finish for any touch-ups that may be necessary.
Final inspection and touch-ups
After buffing and polishing the wood surface, it’s important to inspect it carefully for any imperfections that may require touch-ups. This can include small scratches, blemishes, or areas where the protective finish may not have been applied evenly. These imperfections can often be easily fixed by applying an additional coat of protective finish or by using touch-up products such as markers or fill sticks that are designed specifically for wood finishes. It’s important to carefully match the color and sheen of these products with the existing finish to achieve a seamless repair.
In addition to touch-ups on the finish, it’s also important to inspect any decorative elements that have been added to the wood project for any imperfections that may require attention. This can include loose inlay pieces, uneven carving or marquetry, or areas where decorative elements may have been damaged during finishing. These imperfections can often be easily fixed by reattaching loose pieces with glue, sanding down uneven areas, or applying additional decorative elements as needed. After completing any necessary touch-ups, it’s important to inspect the entire project one final time before considering it finished. This can include checking for any remaining dust or debris on the surface of the wood, ensuring that all decorative elements are securely attached, and verifying that the finish has achieved the desired level of protection and sheen.
In conclusion, finishing wood is an art form that requires careful attention to detail and precision at every step of the process. From sanding and smoothing the surface of the wood to adding decorative elements and applying protective finishes, each step plays an important role in achieving a professional-looking result. By following these steps carefully and taking the time to inspect for any imperfections along the way, woodworkers can achieve beautiful finishes that will stand the test of time.
Discover the art of adding the perfect final touches and finishes to your wooden furniture pieces with our comprehensive guide. Whether you’re a seasoned woodworker or just starting out, our article provides valuable insights and techniques to elevate your woodworking projects. And if you’re looking for more woodworking inspiration, check out this fascinating article on architectural woodwork standards that will surely ignite your creativity and passion for woodworking.
FAQs
What are some common techniques for applying final touches and finishes to wooden furniture pieces?
Some common techniques for applying final touches and finishes to wooden furniture pieces include sanding, staining, painting, varnishing, and waxing.
What is the purpose of sanding wooden furniture before applying finishes?
Sanding wooden furniture helps to smooth out any rough spots, remove imperfections, and create a clean surface for the finishes to adhere to.
What is the difference between staining and painting wooden furniture?
Staining wooden furniture involves applying a translucent color that allows the natural grain of the wood to show through, while painting involves applying an opaque color that covers the natural grain of the wood.
What is varnishing and how does it protect wooden furniture?
Varnishing involves applying a clear protective coating to wooden furniture to enhance its appearance and protect it from moisture, scratches, and other damage.
What is the purpose of waxing wooden furniture?
Waxing wooden furniture helps to create a smooth and lustrous finish, as well as providing a layer of protection against moisture and wear.