

Furniture making is a wonderful hobby that allows you to unleash your creativity and create beautiful pieces for your home. There is a sense of joy and satisfaction that comes from building something with your own hands, and furniture making provides the perfect opportunity to do just that. Whether you’re a beginner or have some experience with woodworking, furniture making can be a rewarding and fulfilling endeavor.
One of the benefits of DIY furniture making is the ability to customize pieces to fit your specific needs and style. When you build your own furniture, you have complete control over the design, size, and materials used. This allows you to create pieces that are not only functional but also reflect your personal taste and style. Additionally, building your own furniture can be more cost-effective than buying ready-made pieces, especially if you have access to affordable materials and tools.
Before diving into furniture making, it’s important to understand the basics. Familiarize yourself with different types of wood and their uses, as well as the essential tools needed for furniture making. Having a good understanding of these fundamentals will set you up for success in your furniture-making journey.
Key Takeaways
- Furniture making requires essential tools and materials for building.
- Designing your own furniture requires creativity and attention to detail.
- Building a solid wood dining table requires step-by-step instructions and precision.
- Crafting a custom bookshelf involves conceptualizing and completing the project.
- Creating a statement piece like a mid-century modern sofa requires skill and patience.
The Essential Tools and Materials for Building Furniture
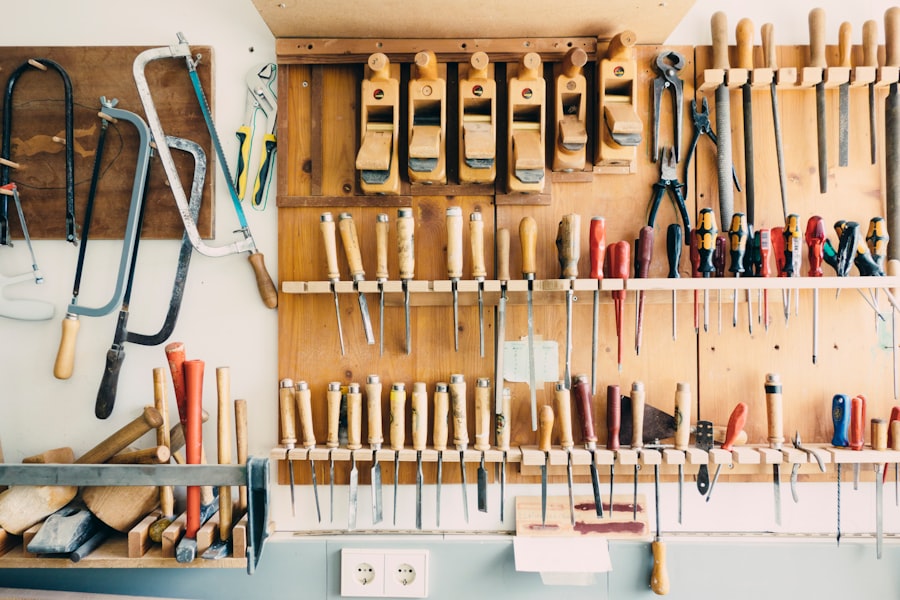
To get started with furniture making, there are several essential tools that you’ll need in your arsenal. These tools will help you measure, cut, shape, and assemble your pieces. Some of the must-have tools include a tape measure, a miter saw or circular saw, a drill, a sander, clamps, and various hand tools such as chisels and screwdrivers.
In addition to tools, you’ll also need to familiarize yourself with different types of wood and their uses. Some common types of wood used in furniture making include oak, pine, maple, cherry, and walnut. Each type of wood has its own unique characteristics and is suited for different purposes. For example, oak is known for its durability and strength, while cherry has a beautiful grain pattern and is often used for more decorative pieces.
Aside from wood, there are other materials that you’ll need for furniture making. This includes screws, nails, glue, and various hardware such as drawer pulls and hinges. It’s important to choose high-quality materials that will ensure the longevity and durability of your furniture.
Designing Your Own Furniture: Tips and Tricks
Designing your own furniture can be an exciting and creative process. It allows you to bring your vision to life and create pieces that are tailored to your specific needs and style. Here are some tips and tricks to help you come up with your own furniture design:
1. Research and gather inspiration: Before starting the design process, it’s helpful to gather inspiration from various sources such as magazines, websites, and furniture showrooms. Look for styles, shapes, and materials that resonate with you and incorporate them into your design.
2. Consider functionality: When designing furniture, it’s important to consider its intended use. Think about how the piece will be used and what features it needs to have in order to be functional. For example, if you’re designing a dining table, consider the size, shape, and seating capacity.
3. Sketch your ideas: Start by sketching out your ideas on paper. This will help you visualize the final product and make any necessary adjustments before starting the building process. Don’t worry about being an artist – a simple sketch will do.
4. Take measurements: Before building your furniture, it’s crucial to take accurate measurements of the space where the piece will be placed. This will ensure that the finished piece fits perfectly in its intended location.
5. Plan ahead: Once you have a clear design in mind, create a detailed plan that includes a list of materials needed, measurements, and step-by-step instructions. This will help keep you organized and ensure a smooth building process.
Building a Solid Wood Dining Table: Step-by-Step Instructions
Building a dining table is a great project for beginners and can be a focal point in any dining room. Here are step-by-step instructions for building a solid wood dining table:
1. Gather your materials: For this project, you’ll need solid wood boards for the tabletop, legs, and aprons. You’ll also need screws, wood glue, and sandpaper.
2. Cut the tabletop boards: Start by cutting the boards for the tabletop to the desired length. Use a miter saw or circular saw to make straight cuts.
3. Join the tabletop boards: Apply wood glue to the edges of the boards and clamp them together. Use screws to secure the boards from underneath.
4. Cut the legs and aprons: Cut the legs and aprons to the desired length using a miter saw or circular saw.
5. Attach the legs and aprons: Attach the legs to the corners of the tabletop using screws and wood glue. Then attach the aprons to the legs using screws.
6. Sand and finish: Sand the entire table to smooth out any rough edges or imperfections. Apply a finish of your choice, such as stain or paint, to protect the wood and enhance its appearance.
7. Enjoy your new dining table: Once the finish has dried, your dining table is ready to be used and enjoyed.
Crafting a Custom Bookshelf: From Concept to Completion
A custom bookshelf is not only a functional piece of furniture but also a great way to showcase your personal style and taste. Here’s how you can design and build your own custom bookshelf:
1. Determine the size and shape: Measure the space where you want to place your bookshelf and determine its size and shape. Consider factors such as height, width, and depth.
2. Choose your materials: Select the type of wood you want to use for your bookshelf. Consider the style and color of the wood, as well as its durability and strength.
3. Sketch your design: Sketch out your design on paper, taking into account the number of shelves, the spacing between them, and any additional features such as drawers or doors.
4. Cut the pieces: Use a miter saw or circular saw to cut the pieces for the sides, shelves, and back of the bookshelf. Make sure to double-check your measurements before making any cuts.
5. Assemble the bookshelf: Start by attaching the sides to the shelves using screws and wood glue. Then attach the back piece to complete the structure.
6. Sand and finish: Sand the entire bookshelf to smooth out any rough edges or imperfections. Apply a finish of your choice to protect the wood and enhance its appearance.
7. Add any additional features: If desired, add any additional features such as drawers, doors, or decorative accents to personalize your bookshelf.
8. Place your books and enjoy: Once the finish has dried, your custom bookshelf is ready to be filled with books and displayed in your home.
Creating a Statement Piece: Building a Mid-Century Modern Sofa
Mid-century modern furniture is known for its sleek lines, organic shapes, and minimalist design. Building a mid-century modern sofa can be a challenging but rewarding project. Here’s how you can build your own mid-century modern sofa:
1. Research mid-century modern design: Familiarize yourself with the characteristics of mid-century modern furniture by researching different styles, materials, and designers from that era.
2. Gather your materials: For this project, you’ll need solid wood boards for the frame, foam cushions, fabric upholstery, and various hardware such as screws and brackets.
3. Build the frame: Start by building the frame of the sofa using solid wood boards. Cut the pieces to the desired length and shape, and assemble them using screws and wood glue.
4. Attach the legs: Mid-century modern furniture is often characterized by its tapered legs. Attach the legs to the bottom of the sofa using brackets or screws.
5. Add the cushions: Cut foam cushions to fit the seat and back of the sofa. Cover them with fabric upholstery and attach them to the frame using adhesive or upholstery staples.
6. Finish and protect: Apply a finish to the wood frame to protect it and enhance its appearance. You can choose to stain, paint, or leave the wood natural, depending on your preference.
7. Enjoy your new sofa: Once the finish has dried, your mid-century modern sofa is ready to be used and enjoyed.
DIY Upholstery: Reupholstering a Chair or Ottoman
Reupholstering furniture is a great way to give new life to old pieces and customize them to fit your style. Here’s how you can reupholster a chair or ottoman:
1. Choose your fabric: Select a fabric that suits your style and complements the piece of furniture you’re reupholstering. Consider factors such as color, pattern, and durability.
2. Remove the old upholstery: Carefully remove the old fabric from the chair or ottoman, taking note of how it was attached. Use pliers or a staple remover to remove any staples or tacks.
3. Repair and replace: Inspect the frame of the chair or ottoman for any damage or loose parts. Repair or replace any broken or damaged components before moving forward.
4. Cut and attach new fabric: Use the old fabric as a template to cut pieces of the new fabric to size. Attach the new fabric to the chair or ottoman using a staple gun or upholstery tacks.
5. Add any additional features: If desired, add any additional features such as piping, buttons, or decorative trim to enhance the appearance of the piece.
6. Finish and protect: Apply a fabric protector to the new upholstery to help repel stains and spills. This will help keep your newly reupholstered piece looking fresh and clean.
7. Enjoy your refreshed furniture: Once the fabric protector has dried, your reupholstered chair or ottoman is ready to be used and enjoyed.
Making a Rustic Headboard: Using Reclaimed Wood and Metal Accents
Rustic furniture adds warmth and character to any space. Building a rustic headboard using reclaimed wood and metal accents is a great way to incorporate this style into your bedroom. Here’s how you can build your own rustic headboard:
1. Gather your materials: For this project, you’ll need reclaimed wood boards for the headboard, metal accents such as brackets or nails, screws, and wood glue.
2. Prepare the wood: Clean and sand the reclaimed wood boards to remove any dirt or debris. This will also help smooth out any rough edges or imperfections.
3. Cut the pieces: Cut the reclaimed wood boards to the desired length and shape for your headboard. Consider factors such as height, width, and any additional features such as a shelf or decorative accents.
4. Assemble the headboard: Arrange the cut pieces of reclaimed wood in the desired pattern for your headboard. Attach them together using screws and wood glue.
5. Add metal accents: To enhance the rustic look of the headboard, add metal accents such as brackets or nails. Attach them to the wood using screws or adhesive.
6. Finish and protect: Apply a finish to the wood to protect it and enhance its appearance. You can choose to stain, paint, or leave the wood natural, depending on your preference.
7. Install the headboard: Once the finish has dried, your rustic headboard is ready to be installed in your bedroom. Follow the manufacturer’s instructions for attaching the headboard to your bed frame or wall.
Building a Minimalist Desk: Sleek and Simple Design Ideas
A minimalist desk is a sleek and simple addition to any home office or workspace. Here’s how you can build your own minimalist desk:
1. Determine the size and shape: Measure the space where you want to place your desk and determine its size and shape. Consider factors such as height, width, and depth.
2. Choose your materials: Select the type of wood or other material you want to use for your desk. Consider factors such as durability, strength, and aesthetics.
3. Cut the pieces: Use a miter saw or circular saw to cut the pieces for the desktop, legs, and any additional features such as drawers or shelves. Make sure to double-check your measurements before making any cuts.
4. Assemble the desk: Start by attaching the legs to the desktop using screws and wood glue. Then attach any additional features such as drawers or shelves.
5. Sand and finish: Sand the entire desk to smooth out any rough edges or imperfections. Apply a finish of your choice to protect the wood or other material and enhance its appearance.
6. Install any hardware: If desired, install any hardware such as drawer pulls or cable management solutions to enhance the functionality of your desk.
7. Enjoy your new workspace: Once the finish has dried, your minimalist desk is ready to be used and enjoyed in your home office or workspace.
Finishing Touches: Staining, Painting, and Protecting Your Furniture
Finishing your furniture is an important step that not only enhances its appearance but also protects it from wear and tear. Here are some tips for staining, painting, and protecting your furniture:
1. Staining: Staining is a popular choice for enhancing the natural beauty of wood. Before staining, make sure to sand the wood to remove any imperfections and ensure a smooth surface. Apply the stain using a brush or cloth, following the manufacturer’s instructions. Allow the stain to dry completely before applying a protective finish.
2. Painting: Painting is a great way to add color and personality to your furniture. Before painting, make sure to clean and sand the surface to ensure proper adhesion. Apply a primer if necessary, then apply the paint using a brush or roller. Allow the paint to dry completely before applying additional coats or a protective finish.
3. Protective finishes: Applying a protective finish is crucial for preserving the beauty and longevity of your furniture. There are several types of finishes to choose from, including varnish, polyurethane, lacquer, and wax. Each type of finish has its own unique characteristics and uses. Follow the manufacturer’s instructions for applying the finish and allow it to dry completely before using or moving the furniture.
4. Maintenance: To keep your furniture looking its best, it’s important to properly maintain it. Regularly dust and clean your furniture using a soft cloth or vacuum with a brush attachment. Avoid using harsh chemicals or abrasive cleaners that can damage the finish. If necessary, touch up any scratches or dents with matching paint or stain.
In conclusion, furniture making is a rewarding and fulfilling hobby that allows you to create beautiful and functional pieces for your home. With the right tools, materials, and instructions, anyone can build their own furniture. Whether you’re a beginner or an experienced woodworker, furniture making offers a sense of accomplishment and satisfaction. Not only does it provide an opportunity to showcase your creativity and craftsmanship, but it also allows you to customize pieces to fit your specific needs and style. Additionally, furniture making can be a cost-effective alternative to buying pre-made furniture, as you can often save money by building your own. Overall, furniture making is a hobby that can bring joy and pride as you transform raw materials into stunning pieces that enhance the beauty and functionality of your home.
If you’re looking for detailed guides on creating various types of furniture from scratch, you’ll definitely want to check out Clever Wood Projects. They have a fantastic article on outdoor wood furniture that provides step-by-step instructions and tips for building your own beautiful pieces for your backyard oasis. Whether you’re a beginner or an experienced woodworker, this guide will help you create stunning outdoor furniture that will withstand the elements and enhance your outdoor space. Don’t miss out on this valuable resource! Click here to read the article and start building your dream outdoor furniture today.
FAQs
What is the article about?
The article is about creating various types of furniture from scratch and provides detailed guides on how to do so.
What types of furniture are covered in the article?
The article covers various types of furniture such as chairs, tables, shelves, cabinets, and more.
Do I need any special skills or tools to create furniture from scratch?
Some basic woodworking skills and tools are required to create furniture from scratch. However, the article provides detailed guides and instructions that are easy to follow for beginners.
What materials are needed to create furniture from scratch?
The materials needed to create furniture from scratch depend on the type of furniture being made. Generally, wood, screws, nails, glue, and other hardware are required.
Can I customize the furniture I create?
Yes, you can customize the furniture you create according to your preferences. The article provides tips and suggestions on how to do so.
Is it cost-effective to create furniture from scratch?
Creating furniture from scratch can be cost-effective as it eliminates the need to purchase expensive pre-made furniture. However, the cost of materials and tools should be taken into consideration.
How long does it take to create furniture from scratch?
The time it takes to create furniture from scratch depends on the complexity of the design and the skill level of the person creating it. The article provides estimated time frames for each project.
Can I sell the furniture I create?
Yes, you can sell the furniture you create. However, it is important to ensure that the furniture is of high quality and meets safety standards.


