
There is something timeless and charming about a wooden picture frame. It adds a touch of warmth and elegance to any photograph or artwork, making it the perfect choice for framing cherished memories or displaying your favorite pieces. Wooden frames have been a popular choice for picture framing for centuries, and it’s easy to see why. They have a natural beauty that complements any style of decor, whether it be traditional, modern, or rustic.
One of the reasons why wooden frames are so popular is their versatility. They come in a wide range of finishes and styles, from simple and understated to ornate and decorative. This means that no matter what type of artwork or photograph you want to frame, there is a wooden frame that will enhance its beauty and make it stand out.
Key Takeaways
- Wooden picture frames add a touch of natural beauty to any room.
- To craft a simple wooden picture frame, you’ll need wood, a saw, sandpaper, glue, and clamps.
- Measuring and cutting the wood accurately is crucial for a well-fitted frame.
- Sanding and smoothing the wood will give your frame a professional finish.
- Adding decorative elements, staining or painting, and attaching the picture are the final steps to creating a beautiful wooden picture frame.
Materials Needed for Crafting a Simple Wooden Picture Frame
To craft a simple wooden picture frame, you will need the following materials:
– Wood: You can choose any type of wood you prefer, such as pine, oak, or cherry. Make sure the wood is smooth and free from knots or imperfections.
– Miter saw: This will be used to cut the wood at precise angles.
– Sandpaper: To smooth the edges of the frame.
– Wood glue: To hold the frame together.
– Clamps: These will help keep the frame secure while the glue dries.
– Decorative elements (optional): If you want to add some extra flair to your frame, you can choose decorative elements such as corner brackets or appliques.
– Stain or paint (optional): If you want to change the color of the wood, you can use stain or paint to achieve the desired look.
You can purchase these materials at your local hardware store or online. Make sure to choose high-quality materials that will withstand the test of time.
Measuring and Cutting the Wooden Frame
Before you start cutting the wood, you need to measure the size of the frame you want to create. Measure the length and width of the picture or artwork you want to frame, and add an extra inch to each measurement to allow for overlap. This will ensure that the picture fits snugly inside the frame.
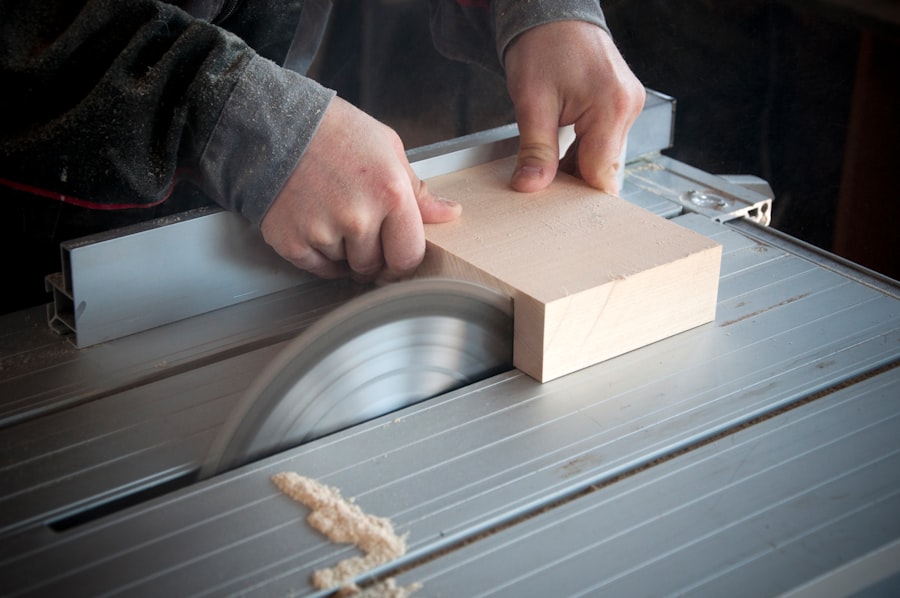
Once you have your measurements, use a miter saw to cut the wood at a 45-degree angle. Make sure to cut two pieces for the length of the frame and two pieces for the width. Double-check your measurements before making any cuts to ensure accuracy.
When cutting the wood, it’s important to take your time and be precise. Use a miter saw with a sharp blade and make slow, steady cuts. If you rush or make careless cuts, it can result in uneven edges or gaps in the frame.
Sanding and Smoothing the Wooden Frame
After cutting the wood, it’s important to sand and smooth the edges of the frame. This will give it a polished and professional look. Start by using coarse-grit sandpaper to remove any rough edges or splinters. Then, switch to fine-grit sandpaper to smooth out the surface of the wood.
Sanding is an important step because it not only improves the appearance of the frame but also ensures that it is safe to handle. Rough edges can cause splinters or scratches, so taking the time to sand them down will make the frame more comfortable to hold.
Assembling the Wooden Frame
To assemble the wooden frame, apply wood glue to one end of each piece of wood and join them together at a 90-degree angle. Use clamps to hold the pieces in place while the glue dries. Make sure that all corners are aligned properly and that there are no gaps between the pieces of wood.
It’s important to choose a high-quality wood glue that will provide a strong bond. Follow the instructions on the glue bottle for the best results. Once the glue has dried, remove the clamps and check that the frame is sturdy and secure.
Adding Decorative Elements to the Wooden Frame
If you want to add some decorative elements to your wooden frame, there are many options to choose from. You can attach corner brackets, appliques, or even small pieces of trim to enhance the look of the frame. These decorative elements can be found at craft stores or online.
To attach the decorative elements, use wood glue or small nails. Make sure to position them evenly on each corner of the frame or along the edges, depending on the design you choose. Take your time and be careful when attaching these elements to ensure they are straight and secure.
Staining or Painting the Wooden Frame
Once the frame is assembled and any decorative elements are attached, you can choose to stain or paint the wood to achieve your desired look. If you prefer the natural beauty of wood, you can skip this step and leave the frame as is. However, if you want to change the color or add a protective finish, staining or painting is a great option.
When choosing a stain or paint, consider the overall aesthetic you want to achieve. If you want a rustic or vintage look, opt for a darker stain or a distressed paint finish. If you prefer a more modern or minimalist look, choose a lighter stain or a clean, solid color.
Before applying the stain or paint, make sure to clean and dry the wood thoroughly. Follow the instructions on the stain or paint can for best results. Apply thin coats and allow each coat to dry completely before applying another one. This will ensure an even and smooth finish.
Attaching the Picture to the Wooden Frame
Once the frame is stained or painted and fully dry, it’s time to attach your picture or artwork. Lay the frame face down on a clean surface and place the picture inside, making sure it is centered. Use small nails or staples to secure the picture to the back of the frame. Make sure to space the nails or staples evenly along the edges to ensure the picture is held securely.
If you are framing a valuable or delicate piece of artwork, it’s a good idea to use acid-free matting or backing board to protect it. This will prevent any damage or discoloration over time.
Hanging the Wooden Picture Frame
To hang your wooden picture frame, you will need a picture hanging kit, which can be purchased at any hardware store. Follow the instructions on the kit for best results. Make sure to choose the right type of hanger for your frame, depending on its weight and size.
Before hanging the frame, use a level to ensure it is straight. Mark the desired location on the wall and use a drill or hammer to insert the hanger. Hang the frame on the hanger and adjust as needed to ensure it is level.
Enjoying Your Handcrafted Wooden Picture Frame
Crafting your own wooden picture frame can be a rewarding and enjoyable experience. Not only will you have a beautiful and unique frame to display your favorite photographs or artwork, but you will also have the satisfaction of knowing that you created it yourself.
By following these steps and taking your time, you can create a high-quality wooden picture frame that will last for years to come. Whether you choose to keep it for yourself or give it as a gift, your handcrafted frame is sure to be cherished and admired by all who see it.
So go ahead, unleash your creativity and start crafting your own wooden picture frame today!
If you’re interested in expanding your woodworking skills beyond picture frames, you might want to check out this informative article on modern furniture design. It provides step-by-step instructions and a helpful video guide to help you create stunning pieces for your home. Whether you’re a beginner or an experienced woodworker, this resource from Clever Wood Projects will inspire and guide you in your woodworking journey. Click here to learn more about this exciting woodworking project.
FAQs
What materials do I need to craft a wooden picture frame?
To craft a wooden picture frame, you will need wood boards, a saw, sandpaper, wood glue, clamps, a ruler, a pencil, and a picture frame hanger.
What type of wood should I use for the picture frame?
You can use any type of wood for the picture frame, but hardwoods like oak, cherry, and maple are popular choices due to their durability and attractive grain patterns.
What are the steps to craft a wooden picture frame?
The steps to craft a wooden picture frame include measuring and cutting the wood boards to size, sanding the edges and faces of the boards, gluing the boards together, clamping the frame until the glue dries, and attaching a picture frame hanger.
What tools do I need to cut the wood boards?
To cut the wood boards, you will need a saw. A miter saw or a hand saw can be used to make straight cuts, while a coping saw or a jigsaw can be used to make curved cuts.
How do I sand the edges and faces of the wood boards?
To sand the edges and faces of the wood boards, use sandpaper with a grit of 120 or higher. Sand in the direction of the wood grain, and use a sanding block or a sanding sponge to ensure even sanding.
How long should I clamp the wooden picture frame?
You should clamp the wooden picture frame for at least 30 minutes to allow the glue to dry. However, leaving the frame clamped overnight can ensure a stronger bond.
Can I paint or stain the wooden picture frame?
Yes, you can paint or stain the wooden picture frame to match your decor or personal preference. Apply the paint or stain after sanding and before gluing the boards together.


