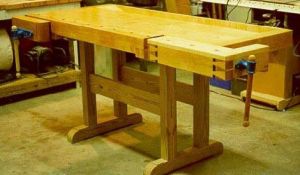
Centuries of people have been practicing the age-old craft of woodworking. Joinery is a fundamental woodworking technique that joins two pieces of wood to form a sturdy and long-lasting structure. The Mortise & Tenon Joint is among the most enduring and dependable joinery techniques available. A type of joinery known as a mortise and tenon joint entails cutting a hole (called a mortise) in one piece of wood and putting a projecting piece (called a tenon) from another piece of wood into the hole.
Key Takeaways
- Mortise and tenon joinery is a traditional woodworking technique that involves joining two pieces of wood by fitting a tenon on one piece into a mortise on the other.
- Mortise and tenon joints are strong, durable, and aesthetically pleasing, making them a popular choice for furniture, doors, and windows.
- There are several types of mortise and tenon joints, including through, blind, and wedged tenons, each with its own advantages and applications.
- To make mortise and tenon joints, you will need a variety of tools, including a saw, chisel, drill, and marking gauge.
- Before cutting mortises and tenons, it is important to prepare the wood by selecting the right species, cutting it to size, and marking out the joints accurately.
By using this technique, the two pieces of wood are joined in a sturdy and safe manner. Mortise & Tenon joinery has a long history dating back to ancient Egypt, when it was employed to build buildings & furniture. Afterwards, the Greeks and Romans adopted it and made extensive use of it in their architectural designs.
Throughout the Middle Ages, the method became commonplace in traditional woodworking and spread throughout Europe. The strength and durability of mortise and tenon joinery are among its primary benefits. A strong connection that can bear stress and large loads is produced by the joint’s interlocking design. Because of this, it’s perfect for building doors, furniture, & other long-lasting, robust structures.
Mortise and Tenon joints are strong and visually beautiful. A touch of elegance can be added to any woodworking project with the seamless connection created by the joint’s clean lines and flush surfaces. For fine furniture and cabinetry, this makes it a popular choice. The adaptability of mortise and tenon joinery is another benefit. Mortise and Tenon Joints, blind mortise and tenon joints, wedged mortise and tenon joints, and haunched mortise & tenon joints are just a few of the joints that can be made with this way.
| Joint Type | Strength | Difficulty | Uses |
|---|---|---|---|
| Mortise and Tenon | Very strong | Intermediate | Furniture, cabinetry, timber framing |
| Dovetail | Extremely strong | Advanced | Drawers, boxes, cabinetry |
| Biscuit | Strong | Easy | Furniture, cabinetry |
| Dowel | Strong | Easy | Furniture, cabinetry |
With a variety of distinct features & uses for each kind of joint, woodworkers can select the best joint for their particular project. 1. Through Mortise and Tenon Joint: In this kind of joint, the tenon passes entirely through the mortise and the mortise hole penetrates the entire piece of wood. In furniture construction, this produces a strong and noticeable joint that is frequently used. 2. Tenon and mortise joint without blindness: In this type of joint, the mortise hole is partially through the wood. Rather, it is concealed inside the wooden segment, resulting in a more understated joint.
The cabinetmaking industry frequently uses this kind of joint. 3. Wedged Mortise and Tenon Joint: Using a wedge inserted into the tenon’s slot, a wedged mortise & tenon joint is strengthened. This gives the joint more strength and stability, which qualifies it for heavy-duty applications. 4.
Haunched Mortise and Tenon Joint: A haunch is an extra piece of wood that protrudes from the tenon in a mortise and tenon joint. This shields the joint from rotation and twisting by adding additional support. There are several tools needed to create mortise and tenon joints.
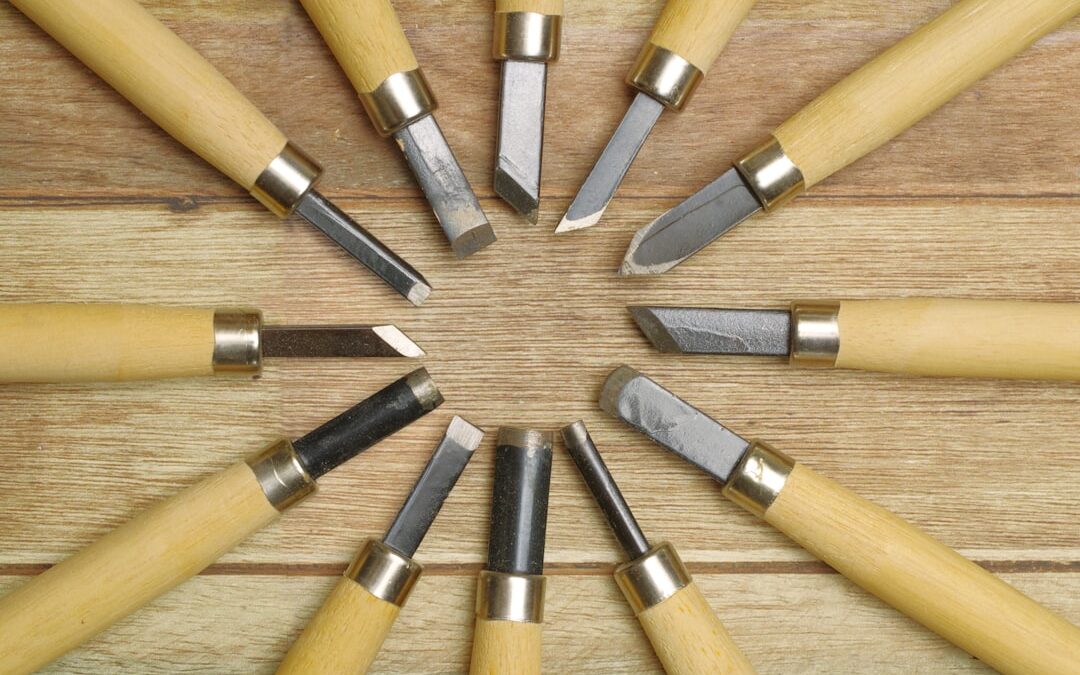
Among these are:1. The tenon is shaped and the waste wood is taken out of the mortise using chisels. To fit a variety of joint types, they are available in a range of sizes and shapes. 2. A mortise hole is cut using a specialized tool called a mortising machine.
To remove the waste wood, it is made up of a drill bit and a chisel that cooperate. Three. Tenon Saw: The tenon is cut to size using a tenon saw. Its thin blade & stiff back enable for clean, accurate cutting. 4. Marking Gauge: The mortise and tenon dimensions are marked on the wood using a marking gauge. It is composed of a cutting wheel that can be adjusted to the appropriate dimensions and a fence. 5.
Mallet: To force the chisel and waste wood out of the mortise, a mallet is employed. It gives just the right amount of force without breaking the wood or the chisel. Proper preparation of the wood is essential before constructing mortise and tenon joints. Accurately measuring, marking, & cutting the wood to the required size are all necessary steps in this process. 1.
Selecting the Proper Wood for Mortise and Tenon Joinery: Strong, stable, and defect-free wood is what is needed for mortise and tenon joints. For their strength and aesthetic value, hardwoods like oak, maple, and cherry are frequently utilized. 2. Precise measurements are essential for crafting well-fitting joints when measuring & marking wood for mortise and tenon joints. Using a marking gauge, mark the dimensions of the mortise and tenon on the wood, ensuring that the lines are straight and parallel. 3.
Mark the wood and then use a saw to cut it to the appropriate length so that it can be used for mortise and tenon joints. Because any errors could impact the fit of the joint, be sure to cut with accuracy & cleanliness. Take out the waste wood from the designated area before making a mortise. Drilling & chiseling can be combined to accomplish this. Here is a detailed tutorial on creating a mortise:1.
How to Mark the Mortise on the Wood: Mark the dimensions of the mortise on the wood using a marking gauge. Verify that the lines are parallel and straight. 2. Making a series of holes inside the designated area with a drill bit that corresponds to the mortise’s width is how to remove scrap wood. These holes will make it easier to remove the waste wood. 3.
Using a chisel, remove the waste wood that is in between the drilled holes to reveal the mortise. To achieve the desired depth, start by making shallow cuts along the designated lines & progressively deepen them. 4. Smoothing the Mortise: Use a file or chisel to make the bottom and walls of the mortise smooth. This will guarantee the tenon a precise and clean fit.
The wood that protrudes & fits into the mortise is called a tenon. The following is a detailed tutorial on creating a tenon:1. Tenon marking: Mark the tenon’s dimensions on the end of the wood with a marking gauge. Verify that the lines are parallel and straight. 2. Tenon cutting: To shape the tenon and remove waste wood, cut along the indicated lines with a tenon saw.
Make sure your cuts are clean and accurate because a mistake could cause the joint to not fit properly. 3. Tenon shaping: To shape the tenon’s shoulders and sides, use a file or chisel. By doing this, the mortise will fit you snugly. 4. Tenon Smoothing: To make the tenon’s surfaces more even, use sandpaper or a file.
This will guarantee a precise and neat fit inside the mortise. For mortise and tendon joints, precise testing & tweaking are necessary to achieve a perfect fit. The following actions will guarantee a snug & seamless fit:1. Tenon insertion into mortise; check for gaps or misalignments to ensure that the joints are well-fitting.
There should be no looseness or wobbling in the joint’s fit. 2. To achieve an ideal fit, fine-tune the mortise and tenon joints by removing small pieces of wood from the mortise or tenon with a chisel or sandpaper if the joint is too tight. Use glue or tiny shims to fill in any gaps if the joint is excessively loose. 3.
Ensure the Mortise & Tenon Joints are flush: After the joint fits perfectly, make sure the surfaces are level and flush. To remove any extra wood and make a seamless connection, use a chisel or sandpaper. It’s critical to correctly glue & clamp the mortise and tenon joints to guarantee a sturdy & secure joint.
The actions to take are as follows:1. Glue Application for Mortise and Tenon Joints: Coat the mortise & tenon with a thin, uniform layer of woodworking glue. Ensure that all surfaces that will come into contact with one another are covered. 2. Applying pressure and maintaining joint integrity with clamps as the glue dries is how to clamp mortise and tenon joints. Achieving a uniform pressure distribution requires careful clamp positioning. 3.
Eliminating surplus adhesive: Upon drying, employ a chisel or a scraper to eliminate any surplus adhesive that might have escaped the joint. This will produce a tidy and polished end. Applying a finish and giving the joint the right upkeep can improve the look and longevity of mortise & tenon joints. You should think about the following finishing methods:1. Smooth the joint surfaces with sandpaper or a sanding block when sanding the mortise and tenon joints.
For a polished finish, begin with a coarse grit and work your way up to finer grits. 2. Mortise and Tenon joint finishing: To preserve the wood and bring out its inherent beauty, use a finish that is appropriate, like oil or varnish. For application and drying times, refer to the manufacturer’s instructions. Three.
To ensure the longevity of Mortise & Tenon joints, it is important to periodically examine them for any indications of wear or damage. To guarantee that the joint stays sturdy and secure, reapply a finish or make any required repairs. In summary, mortise and tenon joinery is an elaborate & sophisticated woodworking method that calls for accuracy and skill. But for every woodworking project, the benefits of mortise and tenon joints make them an investment well worth making. With the correct tools and a step-by-step tutorial, anyone can become an expert in the craft of mortise & tenon joinery.
This age-old joinery method can be used to make stunning and long-lasting furniture and woodworking projects with practice and attention to detail.
If you’re interested in learning more about Mortise and tenon joint making, you might also find this article on salvaged lumber use in your home fascinating. It explores the benefits of using reclaimed wood for your woodworking projects and provides valuable tips on how to source and repurpose salvaged lumber. Check it out here for some inspiration on incorporating sustainable materials into your woodworking endeavors.
FAQs
What is a mortise and tenon joint?
A mortise and tenon joint is a type of woodworking joint that is used to join two pieces of wood together at a right angle. It consists of a rectangular hole (the mortise) cut into one piece of wood and a corresponding protrusion (the tenon) on the other piece of wood that fits snugly into the mortise.
What are the advantages of using a mortise and tenon joint?
Mortise and tenon joints are known for their strength and durability, making them ideal for use in furniture and other woodworking projects that require a sturdy joint. They also provide a clean, attractive appearance and can be used to create a variety of different joint configurations.
What tools are needed to make a mortise and tenon joint?
To make a mortise and tenon joint, you will need a variety of woodworking tools, including a saw, chisel, drill, and marking tools such as a square and marking gauge. You may also need a router or mortising machine to create the mortise.
What are the steps involved in making a mortise and tenon joint?
The process of making a mortise and tenon joint involves several steps, including measuring and marking the wood, cutting the tenon, drilling the mortise, and fitting the tenon into the mortise. The exact steps will depend on the specific joint configuration and the tools being used.
What are some tips for making a strong mortise and tenon joint?
To ensure a strong and durable mortise and tenon joint, it is important to use high-quality wood and to make precise cuts and measurements. You should also use a strong adhesive such as wood glue to secure the joint, and consider adding additional reinforcement such as dowels or screws if necessary.