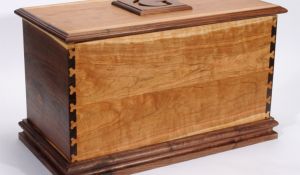
Wood staining is a beautiful and versatile technique that enhances the natural beauty of wood while adding color and depth. Whether you are working on a small DIY project or refinishing a piece of furniture, understanding the basics of wood staining is essential to achieve the desired results. By choosing the right type of stain, preparing the wood surface properly, and applying the stain evenly, you can create stunning finishes that will last for years to come.
Key Takeaways
- Wood staining involves adding color to wood while still allowing the natural grain to show through.
- There are two main types of wood stain: oil-based and water-based, each with their own advantages and disadvantages.
- Properly preparing the wood surface before staining is crucial for achieving a smooth and even finish.
- Choosing the right tools, such as brushes or sprayers, can make a big difference in the final result of your staining project.
- Applying stain evenly requires patience and attention to detail, including wiping off excess stain and blending in overlapping areas.
Understanding the Basics of Wood Staining
Wood staining is the process of applying a colored pigment or dye to wood to enhance its appearance. There are two main types of wood stains: oil-based stains and water-based stains. Oil-based stains penetrate deep into the wood, providing a rich and durable finish. Water-based stains, on the other hand, dry quickly and are easier to clean up, making them a popular choice for beginners.
Wood stains work by penetrating the pores of the wood and coloring the fibers. The color intensity depends on the type of stain used and the number of coats applied. It is important to note that wood stains do not provide any protection against moisture or UV rays. To protect the stained wood, it is necessary to apply a clear topcoat or sealer.
Choosing the Right Type of Stain for Your Wood
When choosing a wood stain, there are several factors to consider. First, consider the type of wood you are working with. Different types of wood absorb stain differently, so it is important to choose a stain that will work well with your specific type of wood. Additionally, consider the desired color and finish. Wood stains come in a wide range of colors and finishes, from light and natural tones to dark and rich hues.
Popular wood stain colors include oak, walnut, mahogany, and ebony. Oak stains provide a warm and golden tone, while walnut stains create a rich and deep brown color. Mahogany stains offer a reddish-brown hue, and ebony stains provide a dark and dramatic finish. It is important to test the stain on a small, inconspicuous area of the wood before applying it to the entire surface to ensure that you achieve the desired color.
Preparing Your Wood Surface for Staining
Properly preparing your wood surface is crucial for achieving a smooth and even finish. Start by sanding the wood to remove any imperfections, such as scratches or dents. Use a medium-grit sandpaper to smooth out the surface, followed by a fine-grit sandpaper to create a smooth finish. After sanding, clean the wood surface thoroughly to remove any dust or debris.
Next, apply a wood conditioner to the surface. Wood conditioner helps the stain penetrate evenly and prevents blotching or uneven color absorption. Allow the conditioner to dry completely before applying the stain. It is important to note that not all types of wood require a wood conditioner. Hardwoods, such as oak or maple, typically do not require conditioning, while softwoods, such as pine or cedar, benefit from using a conditioner.
Selecting the Right Tools for Staining
Having the right tools for staining is essential for achieving professional-looking results. Some essential tools for staining include brushes, rags, foam applicators, and sprayers. Brushes are versatile and can be used for both oil-based and water-based stains. Rags are great for applying stain in hard-to-reach areas or for creating a more rustic look. Foam applicators are ideal for water-based stains as they provide an even application.
When choosing staining tools, consider the size of your project and the type of stain you are using. For larger projects, such as staining a deck or fence, a sprayer may be more efficient. However, for smaller projects or intricate details, brushes or rags may be more suitable. It is important to choose high-quality tools that are specifically designed for staining to ensure a smooth and even application.
Techniques for Applying Stain Evenly

Applying stain evenly is crucial for achieving a professional-looking finish. Start by stirring the stain thoroughly to ensure that the color pigments are evenly distributed. Apply the stain in the direction of the wood grain using long, smooth strokes. Avoid applying too much stain at once, as this can lead to blotching or uneven color absorption.
To achieve an even finish, work in small sections and blend the stain as you go. This will help prevent any visible lines or streaks. If you are using a brush, lightly feather the edges of each section to create a seamless transition between areas. If you are using a rag or foam applicator, make sure to apply the stain evenly and avoid leaving any excess stain on the surface.
Tips for Achieving Consistent Color and Finish
Several factors can affect the color and finish of your stain, including the type of wood, the number of coats applied, and the drying time between coats. To achieve consistent color and finish, it is important to follow the manufacturer’s instructions and test the stain on a small, inconspicuous area before applying it to the entire surface.
To ensure consistent color, apply multiple thin coats of stain rather than one thick coat. This will allow the stain to penetrate evenly and create a more uniform color. Allow each coat to dry completely before applying the next one. It is also important to note that different types of wood absorb stain differently, so it is important to adjust the number of coats accordingly.
Addressing Common Staining Problems
While wood staining can be a rewarding process, it is not without its challenges. Common staining problems include blotching, uneven color absorption, and streaking. Blotching occurs when the wood absorbs stain unevenly, resulting in dark or light spots. To prevent blotching, it is important to use a wood conditioner and apply the stain evenly.
Uneven color absorption can occur when the wood is not properly prepared or when the stain is not applied evenly. To address this issue, make sure to sand the wood surface thoroughly and apply the stain in thin, even coats. Streaking can occur when the stain is not blended properly or when too much stain is applied at once. To avoid streaking, work in small sections and blend the stain as you go.
Sanding and Sealing After Staining
Sanding and sealing after staining is essential for achieving a smooth and durable finish. After the stain has dried completely, lightly sand the surface with a fine-grit sandpaper to remove any roughness or imperfections. This will create a smooth finish and prepare the surface for sealing.
After sanding, apply a clear topcoat or sealer to protect the stained wood. Topcoats provide a protective barrier against moisture, UV rays, and everyday wear and tear. There are several types of topcoats available, including polyurethane, varnish, and lacquer. Choose a topcoat that is compatible with your stain and follow the manufacturer’s instructions for application.
Maintaining and Protecting Your Stained Wood
Maintaining and protecting your stained wood is essential for preserving its beauty and longevity. Regular cleaning is important to remove dirt, dust, and grime that can accumulate on the surface. Use a mild detergent or wood cleaner and a soft cloth or sponge to clean the stained wood. Avoid using harsh chemicals or abrasive cleaners as they can damage the finish.
In addition to regular cleaning, it is important to periodically reapply a topcoat or sealer to protect the stained wood. The frequency of reapplication depends on the type of topcoat used and the amount of wear and tear the wood is exposed to. It is also important to inspect the stained wood regularly for any signs of damage or wear and address any issues promptly.
Advanced Staining Techniques for Unique Finishes
Once you have mastered the basics of wood staining, you can experiment with advanced techniques to create unique finishes. Some creative staining techniques include color blending, distressing, and layering. Color blending involves mixing different stains together to create custom colors. Distressing involves intentionally creating a weathered or aged look by sanding or scraping the stained wood. Layering involves applying multiple coats of different stains to create depth and dimension.
When experimenting with advanced staining techniques, it is important to test the technique on a small, inconspicuous area before applying it to the entire surface. This will allow you to see how the technique will look and make any necessary adjustments. It is also important to have a clear vision of the desired outcome and take your time to achieve the desired results.
The Art of Wood Staining
Wood staining is a beautiful and versatile technique that allows you to enhance the natural beauty of wood while adding color and depth. By understanding the basics of wood staining, choosing the right type of stain, preparing the wood surface properly, and applying the stain evenly, you can achieve stunning finishes that will last for years to come.
While wood staining can be challenging at times, with practice and patience, you can master this art form and create unique finishes that reflect your personal style. Don’t be afraid to experiment with different staining techniques and colors to create one-of-a-kind pieces that showcase your creativity. The possibilities are endless when it comes to wood staining, so embrace this art form and enjoy the beauty and versatility it brings to your woodworking projects.
If you’re interested in staining wood evenly and effectively, you may also find this article on Clever Wood Projects helpful: “What Advantages Does Rockler Woodworking Offer Compared to Other Woodworking Suppliers?” Rockler Woodworking is known for its high-quality products and extensive range of woodworking supplies. This article explores the unique advantages that Rockler offers, making it a go-to choice for woodworkers. Check it out here.
FAQs
What is wood staining?
Wood staining is the process of applying a colored pigment or dye to wood to enhance its natural beauty or change its color.
Why should I stain wood?
Staining wood can protect it from damage caused by moisture, sunlight, and insects. It can also enhance the natural grain and color of the wood, making it more visually appealing.
What are the different types of wood stains?
There are two main types of wood stains: oil-based and water-based. Oil-based stains penetrate deeper into the wood and provide a more durable finish, while water-based stains dry faster and are easier to clean up.
How do I prepare the wood for staining?
Before staining, the wood should be sanded to remove any rough spots or imperfections. It should also be cleaned and free of any dust or debris.
What tools do I need to stain wood?
You will need a brush or applicator to apply the stain, as well as a cloth or rag to wipe away any excess. You may also need sandpaper, a wood conditioner, and a sealer or topcoat.
How do I apply the stain evenly?
To apply the stain evenly, work in small sections and apply the stain in the direction of the wood grain. Use a brush or applicator to apply the stain, and then use a cloth or rag to wipe away any excess.
How many coats of stain should I apply?
The number of coats of stain you should apply depends on the desired color and level of protection. Generally, one to two coats is sufficient, but you may need more for a darker or richer color.
How long does it take for the stain to dry?
The drying time for wood stain varies depending on the type of stain and the humidity and temperature of the environment. Generally, it takes 24-48 hours for the stain to dry completely.
Do I need to seal the wood after staining?
It is recommended to seal the wood after staining to protect it from damage and enhance its durability. A sealer or topcoat can also add a glossy or matte finish to the wood.