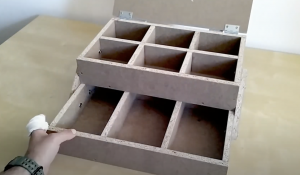
Having a key holder in your home is essential for keeping your keys organized and easily accessible. It eliminates the frustration of searching for misplaced keys and ensures that you always know where to find them. While there are many options available on the market, a wooden key holder is a great choice for its durability, aesthetic appeal, and versatility. Building your own wooden key holder allows you to customize it to your liking and showcase your DIY skills. In this article, we will guide you through the process of building a wooden key holder, from selecting the materials to hanging it on your wall.
Key Takeaways
- A wooden key holder is a must-have for any home to keep keys organized and easily accessible.
- To build your own wooden key holder, you will need materials such as wood, saw, drill, sandpaper, and hooks.
- Follow a step-by-step guide to build your own wooden key holder and choose the right wood for your project.
- Sand and finish your key holder for a smooth and polished look, and add hooks for functionality.
- Personalize your key holder with creative ideas and properly install and maintain it for long-lasting use.
Materials Needed
Before you start building your wooden key holder, you will need to gather all the necessary materials. Here is a list of what you will need:
– Wood: Choose a high-quality wood that is sturdy and durable. Some popular options include oak, pine, and walnut.
– Saw: You will need a saw to cut the wood into the desired shape and size.
– Sandpaper: Sandpaper is essential for smoothing out the rough edges of the wood.
– Hooks: Select hooks that are strong enough to hold your keys securely. There are various types available, such as traditional hooks or magnetic hooks.
– Drill: A drill will be needed to create holes for the hooks.
– Screws: Use screws to attach the hooks to the wooden board.
– Measuring tape: Accurate measurements are crucial for ensuring that your key holder is properly proportioned.
– Pencil: Use a pencil to mark where you will be cutting and drilling.
– Finishing materials: Depending on your preference, you may want to use varnish, paint, or stain to finish the wood.
You can purchase these materials at your local hardware store or online. When selecting the wood, make sure to choose high-quality lumber that is free from knots or cracks. This will ensure that your key holder is sturdy and long-lasting.
Step-by-Step Guide
Now that you have gathered all the necessary materials, it’s time to start building your wooden key holder. Follow these steps for a successful DIY project:
1. Measure and cut the wood: Use a measuring tape to determine the desired dimensions of your key holder. Mark the measurements on the wood with a pencil. Then, use a saw to cut the wood according to your markings. Make sure to wear protective goggles and gloves while cutting.
2. Sand the wood: After cutting the wood, it’s important to sand it to achieve a smooth and polished look. Start with a coarse-grit sandpaper to remove any rough edges or splinters. Then, switch to a finer-grit sandpaper for a smoother finish. Sand in the direction of the wood grain for best results.
3. Apply finishes: If you want to add color or protect the wood, now is the time to apply finishes such as varnish, paint, or stain. Follow the instructions on the product for best results. Allow the finishes to dry completely before moving on to the next step.
4. Mark and drill holes: Determine where you want to place the hooks on your key holder and mark those spots with a pencil. Use a drill bit that is slightly smaller than the diameter of your hooks and drill holes at each marked spot.
5. Attach hooks: Insert the hooks into the drilled holes and secure them with screws from the back of the wooden board. Make sure they are tight and secure.
Choosing the Right Wood
When building a wooden key holder, it’s important to choose the right type of wood that suits your needs and preferences. Here are some factors to consider when selecting wood for your key holder:
1. Durability: Look for wood that is strong and durable, as it will need to withstand daily use and support the weight of your keys. Hardwoods like oak and walnut are known for their durability and resistance to wear and tear.
2. Aesthetic appeal: Consider the overall look and feel you want to achieve with your key holder. Different types of wood have distinct colors, grains, and textures. For a rustic or natural look, you may opt for pine or cedar. If you prefer a more elegant and refined appearance, walnut or cherry wood may be more suitable.
3. Sustainability: Choosing sustainable wood is not only environmentally friendly but also ensures that your key holder is made from responsibly sourced materials. Look for wood that is certified by organizations such as the Forest Stewardship Council (FSC) to ensure that it comes from well-managed forests.
When selecting the wood, inspect it for any defects such as knots or cracks. These imperfections can weaken the wood and affect the overall quality of your key holder.
Sanding and Finishing
To achieve a smooth and polished look for your wooden key holder, sanding is an essential step. Follow these tips for best results:
1. Start with coarse-grit sandpaper: Use a coarse-grit sandpaper, such as 80 or 100 grit, to remove any rough edges or splinters from the wood. Sand in the direction of the wood grain to avoid damaging the surface.
2. Switch to finer-grit sandpaper: Once you have removed all the roughness, switch to a finer-grit sandpaper, such as 120 or 150 grit, to achieve a smoother finish. Continue sanding in the direction of the wood grain until the surface feels smooth to the touch.
3. Remove dust: After sanding, use a clean cloth or brush to remove any dust or debris from the wood. This will ensure that the finish adheres properly.
Once you have sanded the wood, you can apply finishes to protect and enhance its appearance. Varnish, paint, and stain are popular options for finishing wooden key holders. Choose a finish that suits your style and follow the instructions on the product for application.
Adding Hooks
Adding hooks to your wooden key holder is a crucial step in ensuring that your keys are securely held in place. Here’s how to do it:
1. Determine the placement: Decide where you want to position the hooks on your key holder. Consider the size and number of keys you will be hanging, as well as the overall design of your key holder.
2. Mark the spots: Use a pencil to mark the spots where you will be drilling holes for the hooks. Make sure to measure and mark accurately to ensure that the hooks are evenly spaced.
3. Drill holes: Use a drill bit that is slightly smaller than the diameter of your hooks and drill holes at each marked spot. Be careful not to drill too deep or too close to the edge of the wood.
4. Insert and secure the hooks: Insert the hooks into the drilled holes and secure them with screws from the back of the wooden board. Make sure they are tight and secure, as they will be holding the weight of your keys.
Personalizing Your Key Holder
One of the benefits of building your own wooden key holder is the ability to personalize it according to your taste and style. Here are some creative ideas for customizing your design:
1. Paint or stain: Use paint or stain to add color to your key holder. You can choose a bold and vibrant color to make a statement or opt for a more subtle and natural tone.
2. Engrave or carve: If you have woodworking skills, consider engraving or carving designs onto the wood. This can be anything from simple patterns to intricate motifs or even personalized initials.
3. Add decorative elements: Enhance the aesthetic appeal of your key holder by adding decorative elements such as metal accents, beads, or small trinkets. These can be attached to the wood using glue or screws.
When personalizing your key holder, make sure to consider your home decor style and choose elements that complement the overall look and feel of your space.
Hanging Your Key Holder
Once you have completed building and personalizing your wooden key holder, it’s time to hang it on your wall. Follow these tips for proper installation and placement:
1. Choose the right location: Select a wall in your home that is easily accessible and visible. It should be a place where you frequently pass by, such as near the entrance or in the hallway.
2. Measure and mark: Use a measuring tape to determine the desired height at which you want to hang your key holder. Mark the spots with a pencil.
3. Install wall anchors: If you are hanging your key holder on drywall or plaster, it’s important to use wall anchors to ensure that it is securely attached. Follow the instructions on the wall anchor packaging for proper installation.
4. Hang the key holder: Once the wall anchors are in place, use screws or nails to hang your key holder on the wall. Make sure it is level and secure.
Maintaining Your Key Holder
To keep your wooden key holder looking great for years to come, it’s important to properly maintain it. Here are some tips for cleaning and maintaining the wood:
1. Regular cleaning: Dust your key holder regularly with a soft cloth or brush to remove any dirt or debris. Avoid using harsh chemicals or abrasive cleaners, as they can damage the wood.
2. Avoid moisture: Wood is susceptible to moisture damage, so avoid placing your key holder in areas with high humidity or direct contact with water. If it does get wet, wipe it dry immediately.
3. Fixing damages or scratches: If your key holder gets scratched or damaged, you can fix it by sanding the affected area and applying a matching finish. For deeper scratches or dents, you may need to use wood filler before sanding and finishing.
By following these maintenance tips, you can ensure that your wooden key holder remains in excellent condition and continues to serve its purpose for many years.
Building your own wooden key holder is a rewarding DIY project that allows you to showcase your creativity and craftsmanship. By selecting high-quality materials, following a step-by-step guide, and personalizing the design, you can create a unique and functional key holder that adds a touch of style to your home. With proper maintenance, your wooden key holder will keep your keys organized and easily accessible for years to come. So why not give it a try and enjoy the satisfaction of creating something useful with your own hands?
Looking to expand your woodworking skills? Check out this beginner’s guide on how to create a functional and stylish wooden key holder. This step-by-step tutorial will walk you through the process, from selecting the right wood to adding the finishing touches. And if you’re in need of some quality woodworking tools, be sure to visit cleverwoodprojects.org/woodworkingtools/ for a wide selection of tools and equipment. Happy crafting!
FAQs
What is a wooden key holder?
A wooden key holder is a functional and stylish accessory that is used to keep keys organized and easily accessible. It is usually made of wood and can be designed in various shapes and sizes.
What are the benefits of using a wooden key holder?
Using a wooden key holder helps to keep keys organized and prevents them from getting lost. It also adds a decorative touch to the home or office and can be customized to match the decor.
What materials are needed to create a wooden key holder?
To create a wooden key holder, you will need wood, a saw, sandpaper, wood glue, screws, a drill, and a key hook.
What are the steps to create a wooden key holder?
The steps to create a wooden key holder include measuring and cutting the wood, sanding the edges, gluing and screwing the pieces together, drilling holes for the key hooks, and attaching the key hooks.
Is it difficult to create a wooden key holder?
Creating a wooden key holder is a beginner-level woodworking project that can be completed with basic tools and skills. With the right instructions and materials, anyone can create a functional and stylish wooden key holder.
Can a wooden key holder be customized?
Yes, a wooden key holder can be customized to match the decor of the home or office. It can be painted, stained, or decorated with various materials to create a unique and personalized look.