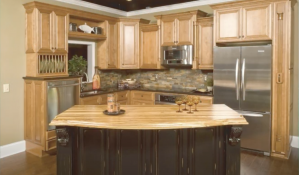
Woodworking is a popular hobby that allows individuals to create beautiful and functional pieces out of wood. Whether you are a beginner or have some experience, woodworking can be a rewarding and fulfilling activity. Not only does it provide a creative outlet, but it also offers numerous benefits such as stress relief, improved hand-eye coordination, and the satisfaction of creating something with your own hands.
In this beginner’s guide to woodworking, we will explore various projects that you can try out to enhance your skills and create unique pieces for your home or as gifts. From building a simple wooden bench to crafting a personalized picture frame, these projects will help you develop your woodworking skills while enjoying the process.
Key Takeaways
- Woodworking is a rewarding hobby that can be enjoyed by beginners and experts alike.
- To get started, you’ll need basic tools like a saw, drill, and sandpaper, as well as materials like wood and screws.
- Projects like a simple wooden bench, a wine rack, a cutting board, and a birdhouse are great for beginners and can be customized to fit your style.
- Sanding and finishing your projects is an important step to ensure a smooth and polished final product.
- Building a wooden planter box is a great way to add a personal touch to your garden and showcase your woodworking skills.
Tools and Materials Needed for Woodworking Projects
Before diving into the projects, it is essential to have the right tools and materials. Here are some essential tools and materials you will need for woodworking:
1. Power Tools:
– Circular saw: Used for making straight cuts in wood.
– Jigsaw: Ideal for making curved cuts or intricate designs.
– Drill: Necessary for making holes and driving screws.
– Random orbital sander: Used for sanding wood surfaces.
2. Hand Tools:
– Chisels: Essential for carving and shaping wood.
– Mallet: Used in conjunction with chisels for more precise cuts.
– Hand saw: Ideal for making smaller cuts or trimming wood pieces.
– Clamps: Necessary for holding pieces together while gluing or assembling.
3. Safety Equipment:
– Safety glasses: Protect your eyes from flying debris.
– Dust mask: Prevent inhalation of sawdust and other particles.
– Ear protection: Reduce noise levels from power tools.
4. Materials:
– Wood: Choose the type of wood that suits your project, such as pine, oak, or maple.
– Screws and nails: Used for joining pieces together.
– Wood glue: Essential for strong and durable joints.
– Sandpaper: Used for smoothing and finishing wood surfaces.
Each tool and material serves a specific purpose in woodworking. Power tools make cutting and shaping wood easier and more efficient, while hand tools allow for more precise and detailed work. Safety equipment is crucial to protect yourself from potential hazards, and the choice of wood and other materials will depend on the project you are working on.
How to Build a Simple Wooden Bench
Building a wooden bench is a great beginner’s project that can be completed in a relatively short amount of time. Here are the step-by-step instructions:
1. Gather your materials and tools: You will need wood boards for the seat, legs, and supports, screws, a drill, a circular saw, a tape measure, and a square.
2. Cut the wood: Measure and cut the boards according to your desired bench size. Cut four legs, two long seat boards, two short seat boards, and four supports.
3. Assemble the frame: Attach the legs to the seat boards using screws. Use a square to ensure that everything is aligned correctly.
4. Attach the supports: Screw the supports between the legs to provide stability and support for the seat boards.
5. Sand and finish: Sand all surfaces of the bench to smooth out any rough edges or imperfections. Apply a finish of your choice to protect the wood and enhance its appearance.
Building a wooden bench is a straightforward project that can be customized to fit your needs. You can adjust the dimensions, add armrests or a backrest, or even paint it in your favorite color. This versatile piece of furniture can be used indoors or outdoors and will add a touch of rustic charm to any space.
DIY Wooden Wine Rack: A Stylish Addition to Your Home
| Material | Dimensions | Capacity | Difficulty Level | Time Required |
|---|---|---|---|---|
| Wood | 24″ x 16″ x 10″ | 8 bottles | Intermediate | 4-6 hours |
If you enjoy wine, why not create a stylish wooden wine rack to display your collection? Here’s how you can do it:
1. Gather your materials and tools: You will need wood boards, a circular saw, a drill, screws, a tape measure, and a level.
2. Measure and cut the wood: Determine the size of your wine rack and cut the boards accordingly. You will need two side panels, a top panel, a bottom panel, and several shelves.
3. Assemble the frame: Attach the side panels to the top and bottom panels using screws. Use a level to ensure that everything is straight and level.
4. Install the shelves: Measure and mark the desired spacing for your wine bottles on the side panels. Attach the shelves using screws or dowels.
5. Sand and finish: Sand all surfaces of the wine rack to smooth out any rough edges. Apply a finish of your choice to protect the wood and enhance its appearance.
To customize your wine rack, you can stain or paint it in a color that matches your home decor. You can also add decorative elements such as metal accents or engraved labels for each shelf. This DIY project is not only functional but also adds a touch of elegance to your home.
Creating a Wooden Cutting Board: A Perfect Gift Idea
A wooden cutting board is not only a practical kitchen tool but also makes for a thoughtful and personalized gift. Here’s how you can create one:
1. Gather your materials and tools: You will need hardwood boards, a table saw, a miter saw, sandpaper, food-safe finish, and clamps.
2. Cut the wood: Measure and cut the hardwood boards into desired lengths using a table saw or miter saw.
3. Arrange the boards: Lay out the boards in a pattern that you like. Make sure they fit together tightly without any gaps.
4. Glue and clamp: Apply wood glue to the edges of each board and press them together. Use clamps to hold them in place until the glue dries.
5. Sand and finish: Sand the surface of the cutting board to smooth out any rough edges. Apply a food-safe finish such as mineral oil or beeswax to protect the wood.
To personalize your cutting board, you can choose different types of wood for a unique pattern or add engraved initials or designs. This project allows you to showcase your woodworking skills while creating a practical and beautiful gift.
Building a Wooden Birdhouse: A Fun Project for Kids and Adults

Building a wooden birdhouse is a fun and educational project that can be enjoyed by both kids and adults. Here’s how you can do it:
1. Gather your materials and tools: You will need wood boards, a jigsaw, screws, a drill, sandpaper, and non-toxic paint or stain.
2. Cut the wood: Measure and cut the wood boards into the desired sizes for the birdhouse walls, roof, and floor using a jigsaw.
3. Assemble the birdhouse: Attach the walls together using screws. Drill an entrance hole in one of the walls and attach the roof.
4. Sand and finish: Sand all surfaces of the birdhouse to smooth out any rough edges. Apply non-toxic paint or stain to protect the wood and add color.
To attract different bird species, you can customize your birdhouse by adjusting the size of the entrance hole or adding perches or ventilation holes. Hang your birdhouse in a suitable location in your garden and enjoy watching birds make it their home.
Tips and Tricks for Sanding and Finishing Your Woodworking Projects
Sanding and finishing are crucial steps in woodworking that can greatly enhance the final appearance of your projects. Here are some tips and tricks to help you achieve a smooth and professional finish:
1. Start with coarse sandpaper: Begin sanding with coarse-grit sandpaper to remove any rough spots or imperfections in the wood. Gradually move to finer-grit sandpaper for a smoother finish.
2. Sand in the direction of the grain: Always sand in the direction of the wood grain to avoid creating scratches or marks on the surface.
3. Use a sanding block: To achieve an even and consistent finish, use a sanding block or a sanding sponge instead of just your hand.
4. Remove dust between sanding stages: After each sanding stage, use a tack cloth or a vacuum to remove any dust or debris from the surface before moving on to the next grit.
5. Test the finish: Before applying the finish to your entire project, test it on a small, inconspicuous area to ensure that you are happy with the color and appearance.
6. Apply multiple coats: For a more durable and long-lasting finish, apply multiple coats of your chosen finish, allowing each coat to dry completely before applying the next.
Remember to always wear safety glasses and a dust mask when sanding to protect yourself from flying debris and sawdust particles. Taking the time to properly sand and finish your woodworking projects will result in a professional-looking piece that you can be proud of.
How to Make a Wooden Picture Frame: A Personalized Touch for Your Home
A wooden picture frame adds a personalized touch to your home decor and allows you to showcase your favorite photos or artwork. Here’s how you can make one:
1. Gather your materials and tools: You will need wood boards, a miter saw, wood glue, clamps, sandpaper, and a finish of your choice.
2. Measure and cut the wood: Determine the size of your picture frame and cut the wood boards accordingly using a miter saw.
3. Assemble the frame: Apply wood glue to the mitered edges of each board and press them together. Use clamps to hold them in place until the glue dries.
4. Sand and finish: Sand the surface of the picture frame to smooth out any rough edges. Apply a finish of your choice to protect the wood and enhance its appearance.
To personalize your picture frame, you can choose different types of wood for a unique look or add decorative elements such as carved designs or metal accents. This project allows you to create a one-of-a-kind frame that complements your home decor and displays your cherished memories.
Building a Wooden Planter Box: A Great Addition to Your Garden
A wooden planter box is a versatile and practical addition to any garden or outdoor space. Here’s how you can build one:
1. Gather your materials and tools: You will need wood boards, a circular saw, screws, a drill, a tape measure, and a level.
2. Measure and cut the wood: Determine the size of your planter box and cut the wood boards accordingly using a circular saw.
3. Assemble the box: Attach the sides of the planter box to the front and back using screws. Use a level to ensure that everything is straight and level.
4. Add a bottom: Cut a piece of plywood or another suitable material to fit inside the planter box as a bottom. Attach it using screws or nails.
5. Drill drainage holes: To prevent water from pooling in the planter box, drill several drainage holes in the bottom.
6. Sand and finish: Sand all surfaces of the planter box to smooth out any rough edges. Apply a finish of your choice to protect the wood from weathering.
To customize your planter box, you can paint or stain it in a color that matches your garden decor or add decorative elements such as carved designs or metal accents. This project allows you to showcase your gardening skills while adding beauty and functionality to your outdoor space.
Why Woodworking is a Rewarding Hobby to Pursue
Woodworking is a rewarding and fulfilling hobby that allows you to unleash your creativity and create beautiful and functional pieces. Whether you are a beginner or have some experience, there are numerous projects that you can try out to enhance your skills and create unique pieces for your home or as gifts.
In this beginner’s guide to woodworking, we have explored various projects such as building a wooden bench, creating a wine rack, making a cutting board, building a birdhouse, making a picture frame, and constructing a planter box. Each project provides step-by-step instructions and includes pictures to illustrate each step.
Woodworking offers numerous benefits such as stress relief, improved hand-eye coordination, and the satisfaction of creating something with your own hands. It is a hobby that can be enjoyed by people of all ages and skill levels. So why not give it a try? Start with one of the projects in this guide and see where your woodworking journey takes you.
If you want to learn more about woodworking, there are plenty of resources available online, including tutorials, forums, and instructional videos. Additionally, consider joining a local woodworking club or taking a class to further develop your skills and connect with other woodworking enthusiasts. Happy woodworking!
If you’re a guy looking to get started with woodworking projects, you’ll definitely want to check out this article on Clever Wood Projects. It provides a great list of beginner-friendly projects that are perfect for guys who are just starting out. From building a simple bookshelf to crafting a wooden beer caddy, these projects will help you develop your skills and create something useful and impressive. For more inspiration and ideas, be sure to explore the other articles on Clever Wood Projects, such as this fascinating piece on a castle with a boat in a moat or this helpful guide on garden planning. Happy woodworking! Click here to read more.
FAQs
What are beginner woodworking projects?
Beginner woodworking projects are simple and easy-to-make woodworking projects that are suitable for people who are new to woodworking. These projects usually involve basic woodworking skills and tools.
What are some examples of beginner woodworking projects?
Some examples of beginner woodworking projects include making a cutting board, a birdhouse, a picture frame, a wooden spoon, a jewelry box, and a simple bench.
What tools do I need for beginner woodworking projects?
Some basic tools that you will need for beginner woodworking projects include a saw, a drill, a hammer, sandpaper, a measuring tape, and a level. You may also need other tools depending on the project you choose.
Where can I find beginner woodworking project ideas?
You can find beginner woodworking project ideas online, in woodworking magazines, or in books about woodworking. You can also ask for suggestions from experienced woodworkers or visit a local woodworking store.
What types of wood are best for beginner woodworking projects?
Softwoods such as pine, cedar, and spruce are good choices for beginner woodworking projects because they are easy to work with and less expensive than hardwoods. Hardwoods such as oak, maple, and cherry are also suitable for beginner projects but may be more difficult to work with.
What safety precautions should I take when doing beginner woodworking projects?
Some safety precautions to take when doing beginner woodworking projects include wearing safety glasses, using ear protection, keeping your work area clean and organized, and following the manufacturer’s instructions for using tools and equipment. It is also important to use sharp tools and to avoid distractions while working.