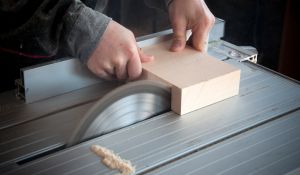
There are several things you should know about measuring. These tips include how to use different types of gauges, how to measure on site, and how to calculate the cost.
Actual vs nominal dimensions
When it comes to woodworking, it’s important to understand the difference between actual and nominal dimensions. A dimensional board may be a nominal size, but its actual dimension may vary by a few millimeters. It’s important to know these differences in order to avoid making expensive mistakes.
The lumber industry has historically used the nominal size. This is a measurement of the width, depth, and thickness of the green board before it’s surfaced, sanded, and dried.
The actual size, or finished lumber, is the size of the board after all four sides have been planed and sanded. As the lumber dries, it will shrink in both width and length.
In a pinch, you can actually use a quick reference guide to figure out the exact size of a wood board. However, it’s best to know how to measure your own lumber.
Marking gauges is more accurate than measuring
Marking gauges are one of the most useful tools you will need in woodworking. These devices enable you to mark off parallel lines on the edges of boards and other metals. The lines you draw using a marking gauge are precise.
There are two main types of marking gauges. One is the conventional type. This is the cheapest and easiest to use. A marking gauge consists of a long, flat piece of wood with a sharp-edged metal point. You can also make your own marking gauge with a square piece of wood and a dowel for the stem.
Another type is a mortise gauge. This type is used to create accurate reference lines for laying out mortise and tenon joints. Its headstock slides along a beam, which is held in place by a thumbscrew.
Trace arcs and circles
If you’re working with a woodworking plan, you’re probably faced with the task of tracing arcs and circles. There are some basic techniques that will allow you to quickly get the job done. However, if you’re working with a large circle or arc, you may need to use more sophisticated set up.
When tracing arcs and circles, it’s important to keep in mind that you’ll have to measure the radius of the arc. This means that you’ll need to draw the arc at least 15 inches wide at the apex. You can also draw the arc using a piece of thin finish nail.
Another way to measure a sweeping arc is to place a strip of thin wood in between the jaws of a pipe clamp. You can then tighten the wood to create an arc of the desired radius. It’s not as accurate as the trammel method, though.
Measure on-site
When it comes to building your dream home or creating your own piece of art, having the right tools can make all the difference. For starters, you need to know the appropriate sizing and laying out your building materials. This may be a tricky task if you aren’t prepared. Fortunately, there are plenty of sites out there devoted to providing you with the blueprints you need. Plus, you don’t have to be an expert to appreciate how much time and money you can save by putting a well-planned project in place.
One of the best ways to do this is to stockpile some wood before you begin. This should include a good mix of dimensional lumber and plywood. In addition to this, you will want to have at least a few dozen feet of hardwood flooring, a few dozen more feet of laminate, and perhaps a few more inches of particleboard. You will also want to have a few hundred dollars worth of paint and finishes. Once you have all of this in place, the fun begins.
Calculate the cost
To determine the cost of woodworking plans, it is important to take into account the material, labour, and overhead costs. Getting these numbers right can help you get the most out of your business.
Materials cost is generally about 40% of the total price of the project. You can also add in overhead costs like marketing and utilities. A woodworking business calculator can help you estimate these figures and figure out how to price your products accordingly.
Labour costs are calculated by the hours required to make a product. Woodworkers may also charge a markup for the time they spend on the job. This markup can vary depending on the type of woodworking project. If you are working on a luxury item, you can charge a higher rate.
Overhead costs include utilities, website costs, and marketing expenses. The rate should be a combination of the annual cost of running your shop, plus the amount of hours you’re working. For instance, if your annual overhead costs are $1,000, you should be charging about $2 per hour.
More Small Woodworking Projects Articles